Your IT Administrator Has Limited Access: 5 Tips to Fix it
Give yourself full admin privileges and put the CMD to good use
5 min. read
Updated on
Read our disclosure page to find out how can you help Windows Report sustain the editorial team. Read more
Many users reported Your IT Administrator has limited access to some areas of this app message while trying to use certain applications. This prevents you from accessing the apps and other affected areas on your PC.
This message is generated if you don’t have administrative privileges but if you log in or change your account to administrator, this problem will be gone. However, the error might also come from an over zealous third-party antivirus or if you disabled Windows Defender.
How do you fix your IT administrator has limited access to some areas?
1. Enable the hidden administrator account
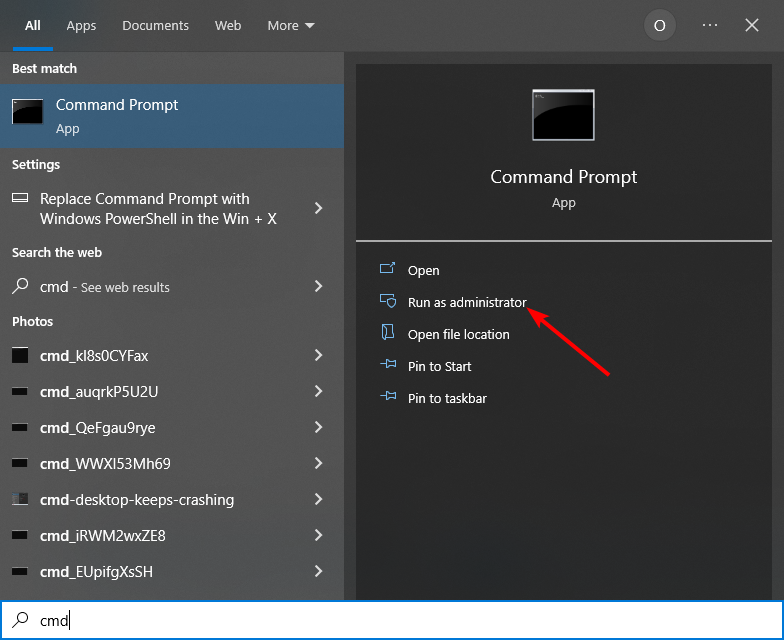
1. Press the Windows key to open the Windows Search box.
2. Type cmd, and click Run as administrator under Command Prompt.
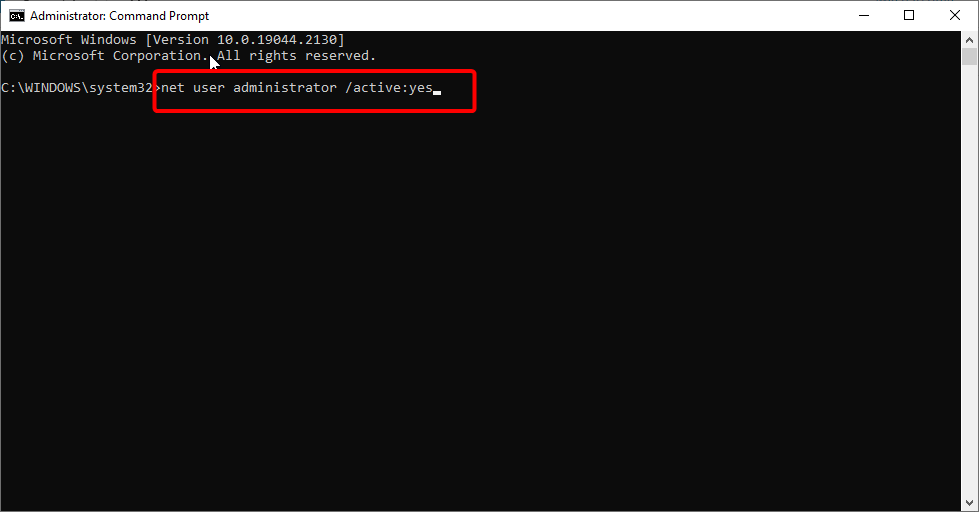
3. When Command Prompt starts, copy and paste the command below and hit Enter:
net user administrator /active:yes4. Now, log out and switch to the administrator account.
5. Check if the problem is still there.
The Your IT administrator has limited access problem can occur if you don’t have the necessary privileges.
In case you don’t know, Windows has its own hidden administrator account for troubleshooting which you can use instead.
Once you’re done with using the administrator account, you can disable it by starting Command Prompt as administrator and running the command below: net user administrator /active:no
2. Remove work or school account
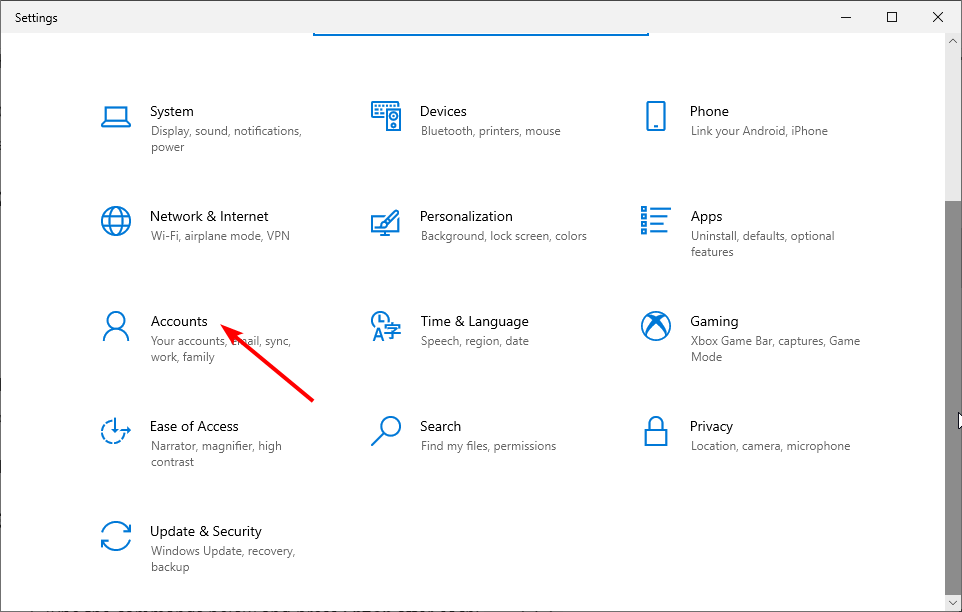
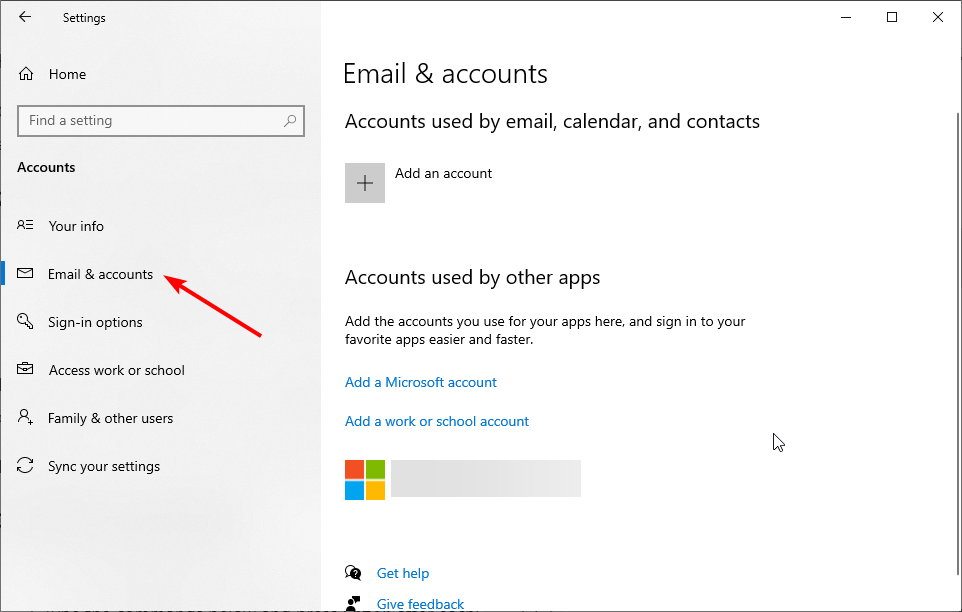
- Press the Windows key + I and select the Accounts option.
- Select Email and Accounts and check if there is a work or school email listed there.
- Remove the email and restart (don’t shut down) your PC.
This can also cause your IT administrator has limited access to some areas of this app error.
If your PC is managed by your organization or school, there is a limit to the things you can do. If some settings are managed by your organization, you need to remove the email and take control of the PC.
3. Use Command Prompt
- Press the Windows key + S, type cmd, and select Run as administrator under Command Prompt.
- Type the commands below and press Enter after each:
reg delete "HKLM\Software\Microsoft\Windows\CurrentVersion\Policies" /freg delete "HKLM\Software\Microsoft\WindowsSelfHost" /freg delete "HKLM\Software\Policies" /freg delete "HKLM\Software\WOW6432Node\Microsoft\Policies" /freg delete "HKLM\Software\WOW6432Node\Microsoft\Windows\CurrentVersion\Policies" /freg delete "HKLM\SOFTWARE\Policies\Microsoft\Windows Defender" /v DisableAntiSpywarereg delete "HKCU\Software\Microsoft\Windows\CurrentVersion\Policies" /freg delete "HKCU\Software\Microsoft\WindowsSelfHost" /freg delete "HKCU\Software\Policies" /freg delete "HKLM\Software\Microsoft\Policies" /f - Note that you might get an error message after some of the commands. Just ignore it and proceed to the next one.
- Restart your PC after running the commands.
In case you can’t find any student or work email on your device and you have removed the third-party antivirus, you can use the commands above to set your policies right.
4. Ensure Windows Defender isn’t disabled by group policy
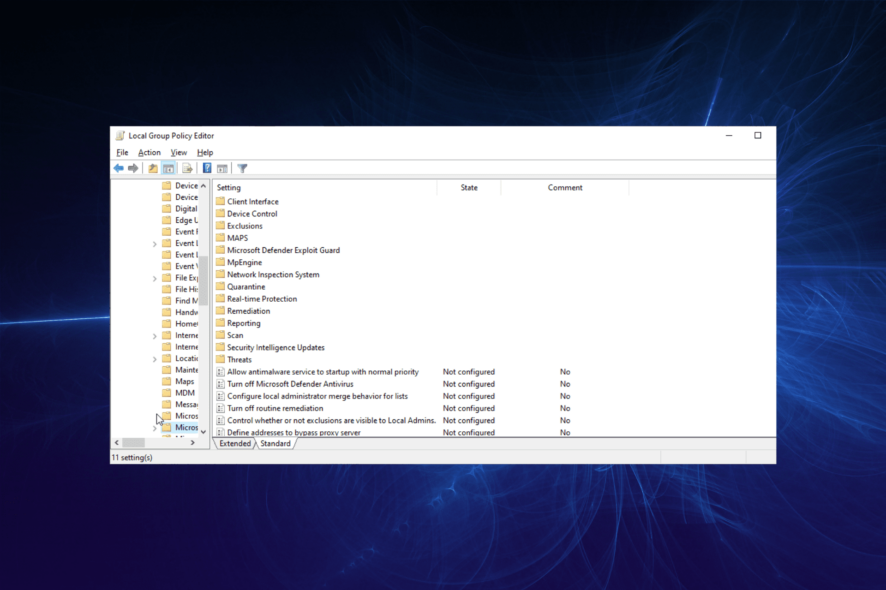
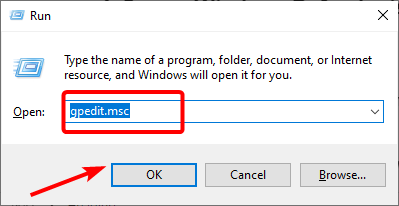
- Press the Windows key + R, type gpedit.msc, and click OK to launch the Group Policy Editor.
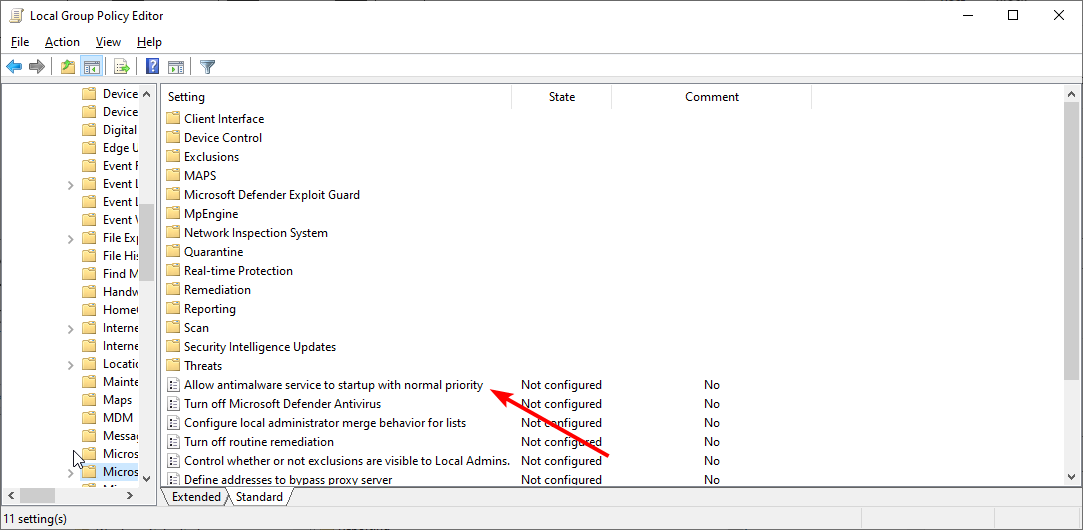
- Navigate to the path below in the left pane:
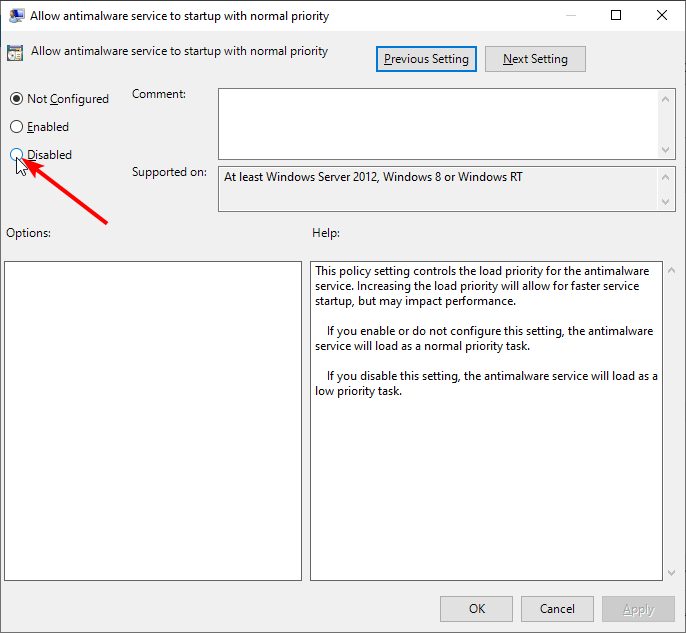
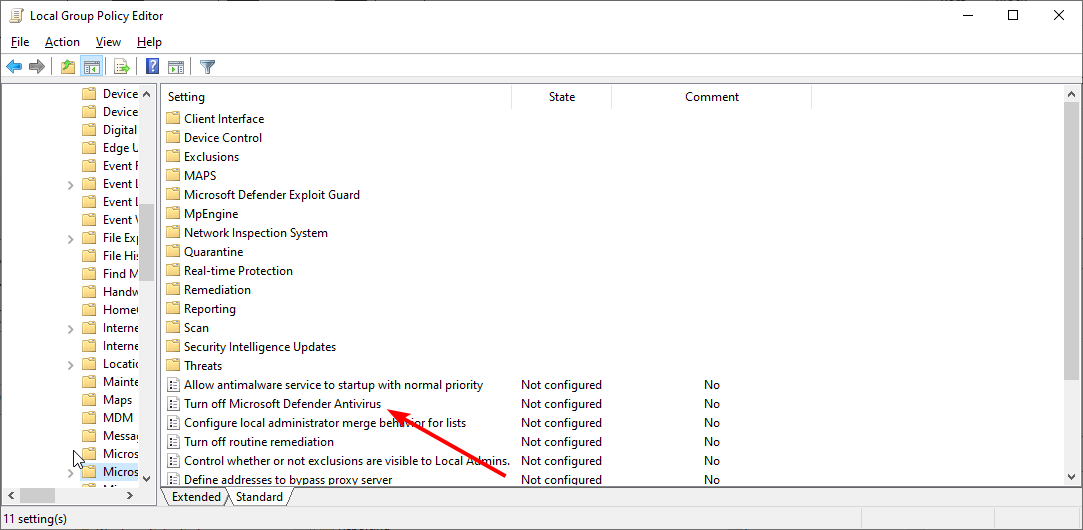
Computer Configuration > Administrative Templates > Windows Components > Microsoft Defender Antivirus - Double-click the Allow antimalware service to startup with normal priority.
- Set this policy to Disabled and click Apply and OK to save changes.
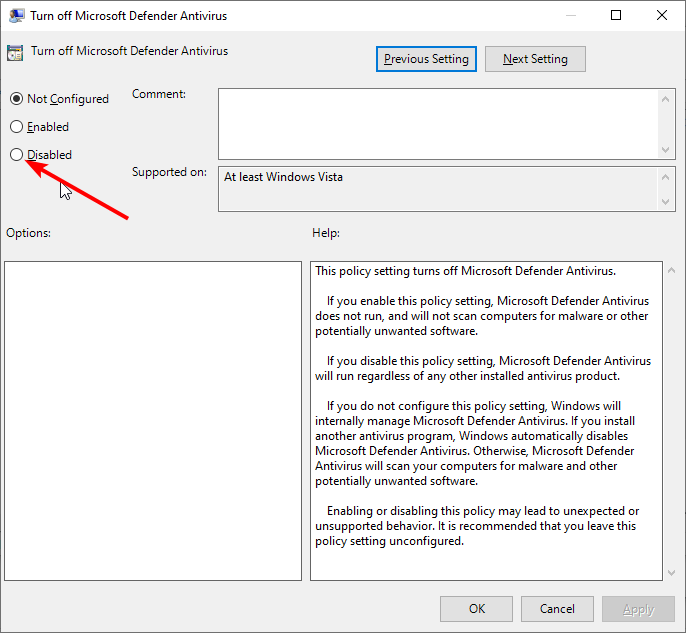
- Now, double-click the Turn off Windows Defender Antivirus.
- Set it to Disabled, then click Apply and OK.
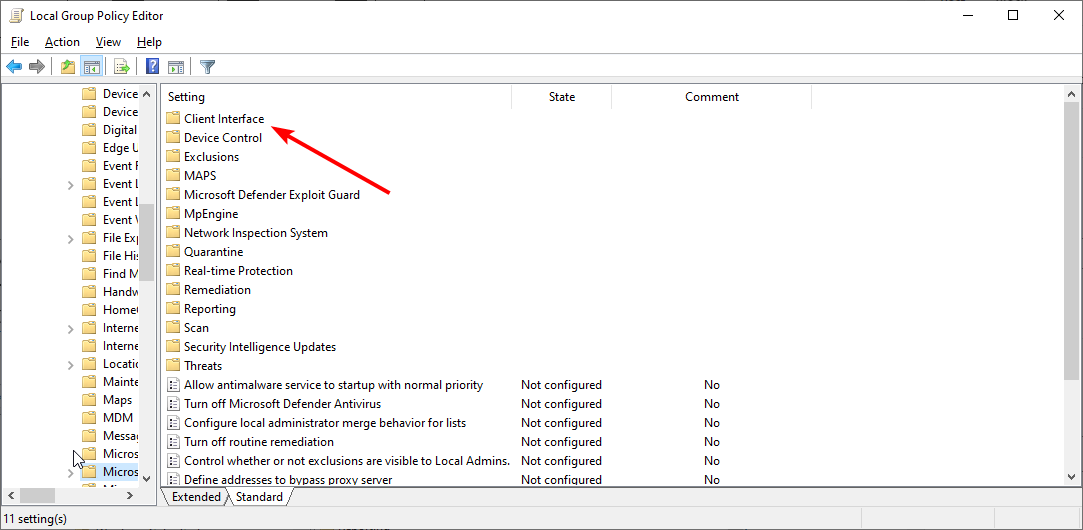
- Now, go back to the Windows Defender Antivirus navigate and double-click Client Interface.
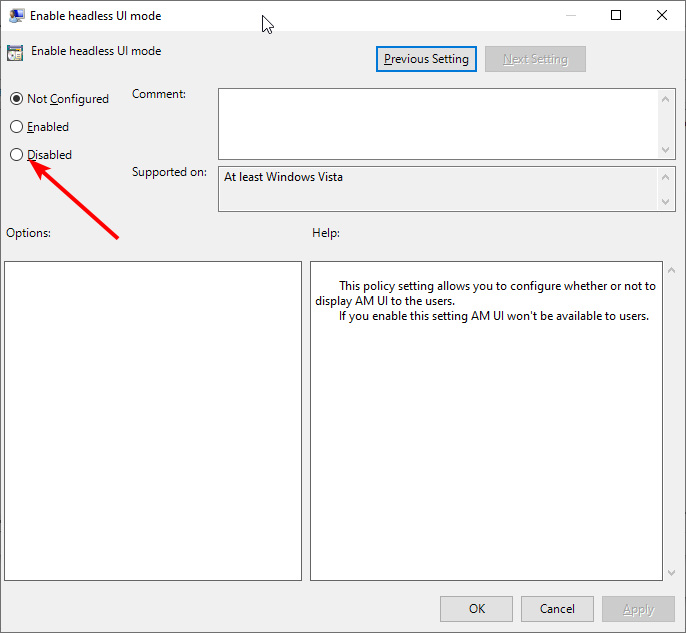
- In the right pane, double-click the Enable headless UI mode.
- Select Disabled and click Apply and OK to save changes.
Windows Defender is closely related to your applications in terms of virus and threat protection, and if you’re getting Your IT Administrator has limited access to some areas of this app message, the reason might be your group policy settings.
This solution helps to turn Windows Defender back on and set the necessary policy right.
5. Delete Windows Defender records
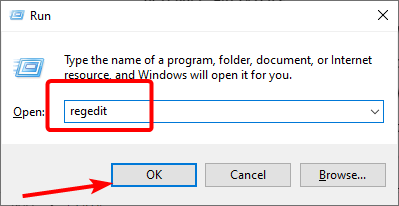
- Press the Windows key + R, type regedit, and click OK.
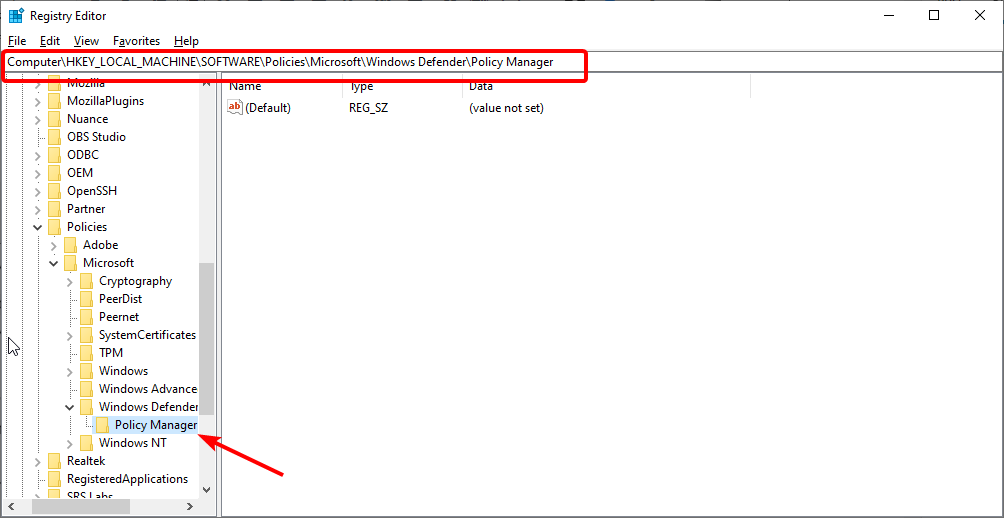
- Navigate to the path below in the left pane:
HKEY_LOCAL_MACHINE\SOFTWARE\Policies\Microsoft\Windows Defender\Policy Manager - Now, delete everything in this folder except the first one.
If you are getting Your IT administrator has limited access error, it might be due to some policies attached to Windows Security. This solution has proved effective for many users and can help you fix the issue too.
Your IT Administrator has limited access to some areas of this app error can cause certain problems on your PC, but we hope that you managed to fix it using some of our solutions.
Check out some of other variations of this error:
- Your IT administrator has limited access to some areas of this app and the item you tried to access – This issue can sometimes occur due to your third-party antivirus, so you might have to disable it temporarily.
- Your system administrator has restricted access to this app Windows Defender – This problem can sometimes occur due to your security policies. To fix it, you might have to adjust your Group Policy settings.
- Virus and Threat protection not available for your IT admin, Windows Security your IT administrator has limited access
- Page not available. Your IT administrator has limited access – Keep in mind that certain features might not be available if you don’t have an administrative account.
- Windows 11 your IT administrator has limited access
- Your IT administrator has limited access Windows 10
If you are facing other issues like your administrator has blocked you from running this app, it’s possible that your CMD has been disabled so check our detailed guide to fix it quickly. And if you’ve been denied access to critical services like services.msc, we also have a fix for that.
Feel free to let us know the solution that helped you fix the issue in the comments below.




User forum
13 messages